
服务器部署FreshRSS+RSSHub并配置到ReadYou
1 使用Docker部署FreshRSS并完成基础设置
1.1 DockerCompose部署FreshRSS
FreshRSS的Docker仓库地址为:https://hub.docker.com/r/freshrss/freshrss/
里面有详尽的部署说明,下面的配置也是从其中摘取了核心的部分。
这里直接用轻量的SQLite做数据库就足够了。
- 创建两个目录挂载FreshRSS的数据
1 | mkdir -p /opt/freshrss/{data,extensions} && cd /opt/freshrss |
- 创建docker-compose文件
1 | vim docker-compose.yml |
- 编写配置内容
1 | services: |
- 启动配置
1 | docker compose up -d |
1.2 Nginx配置反向代理
1 | #FreshRSS |
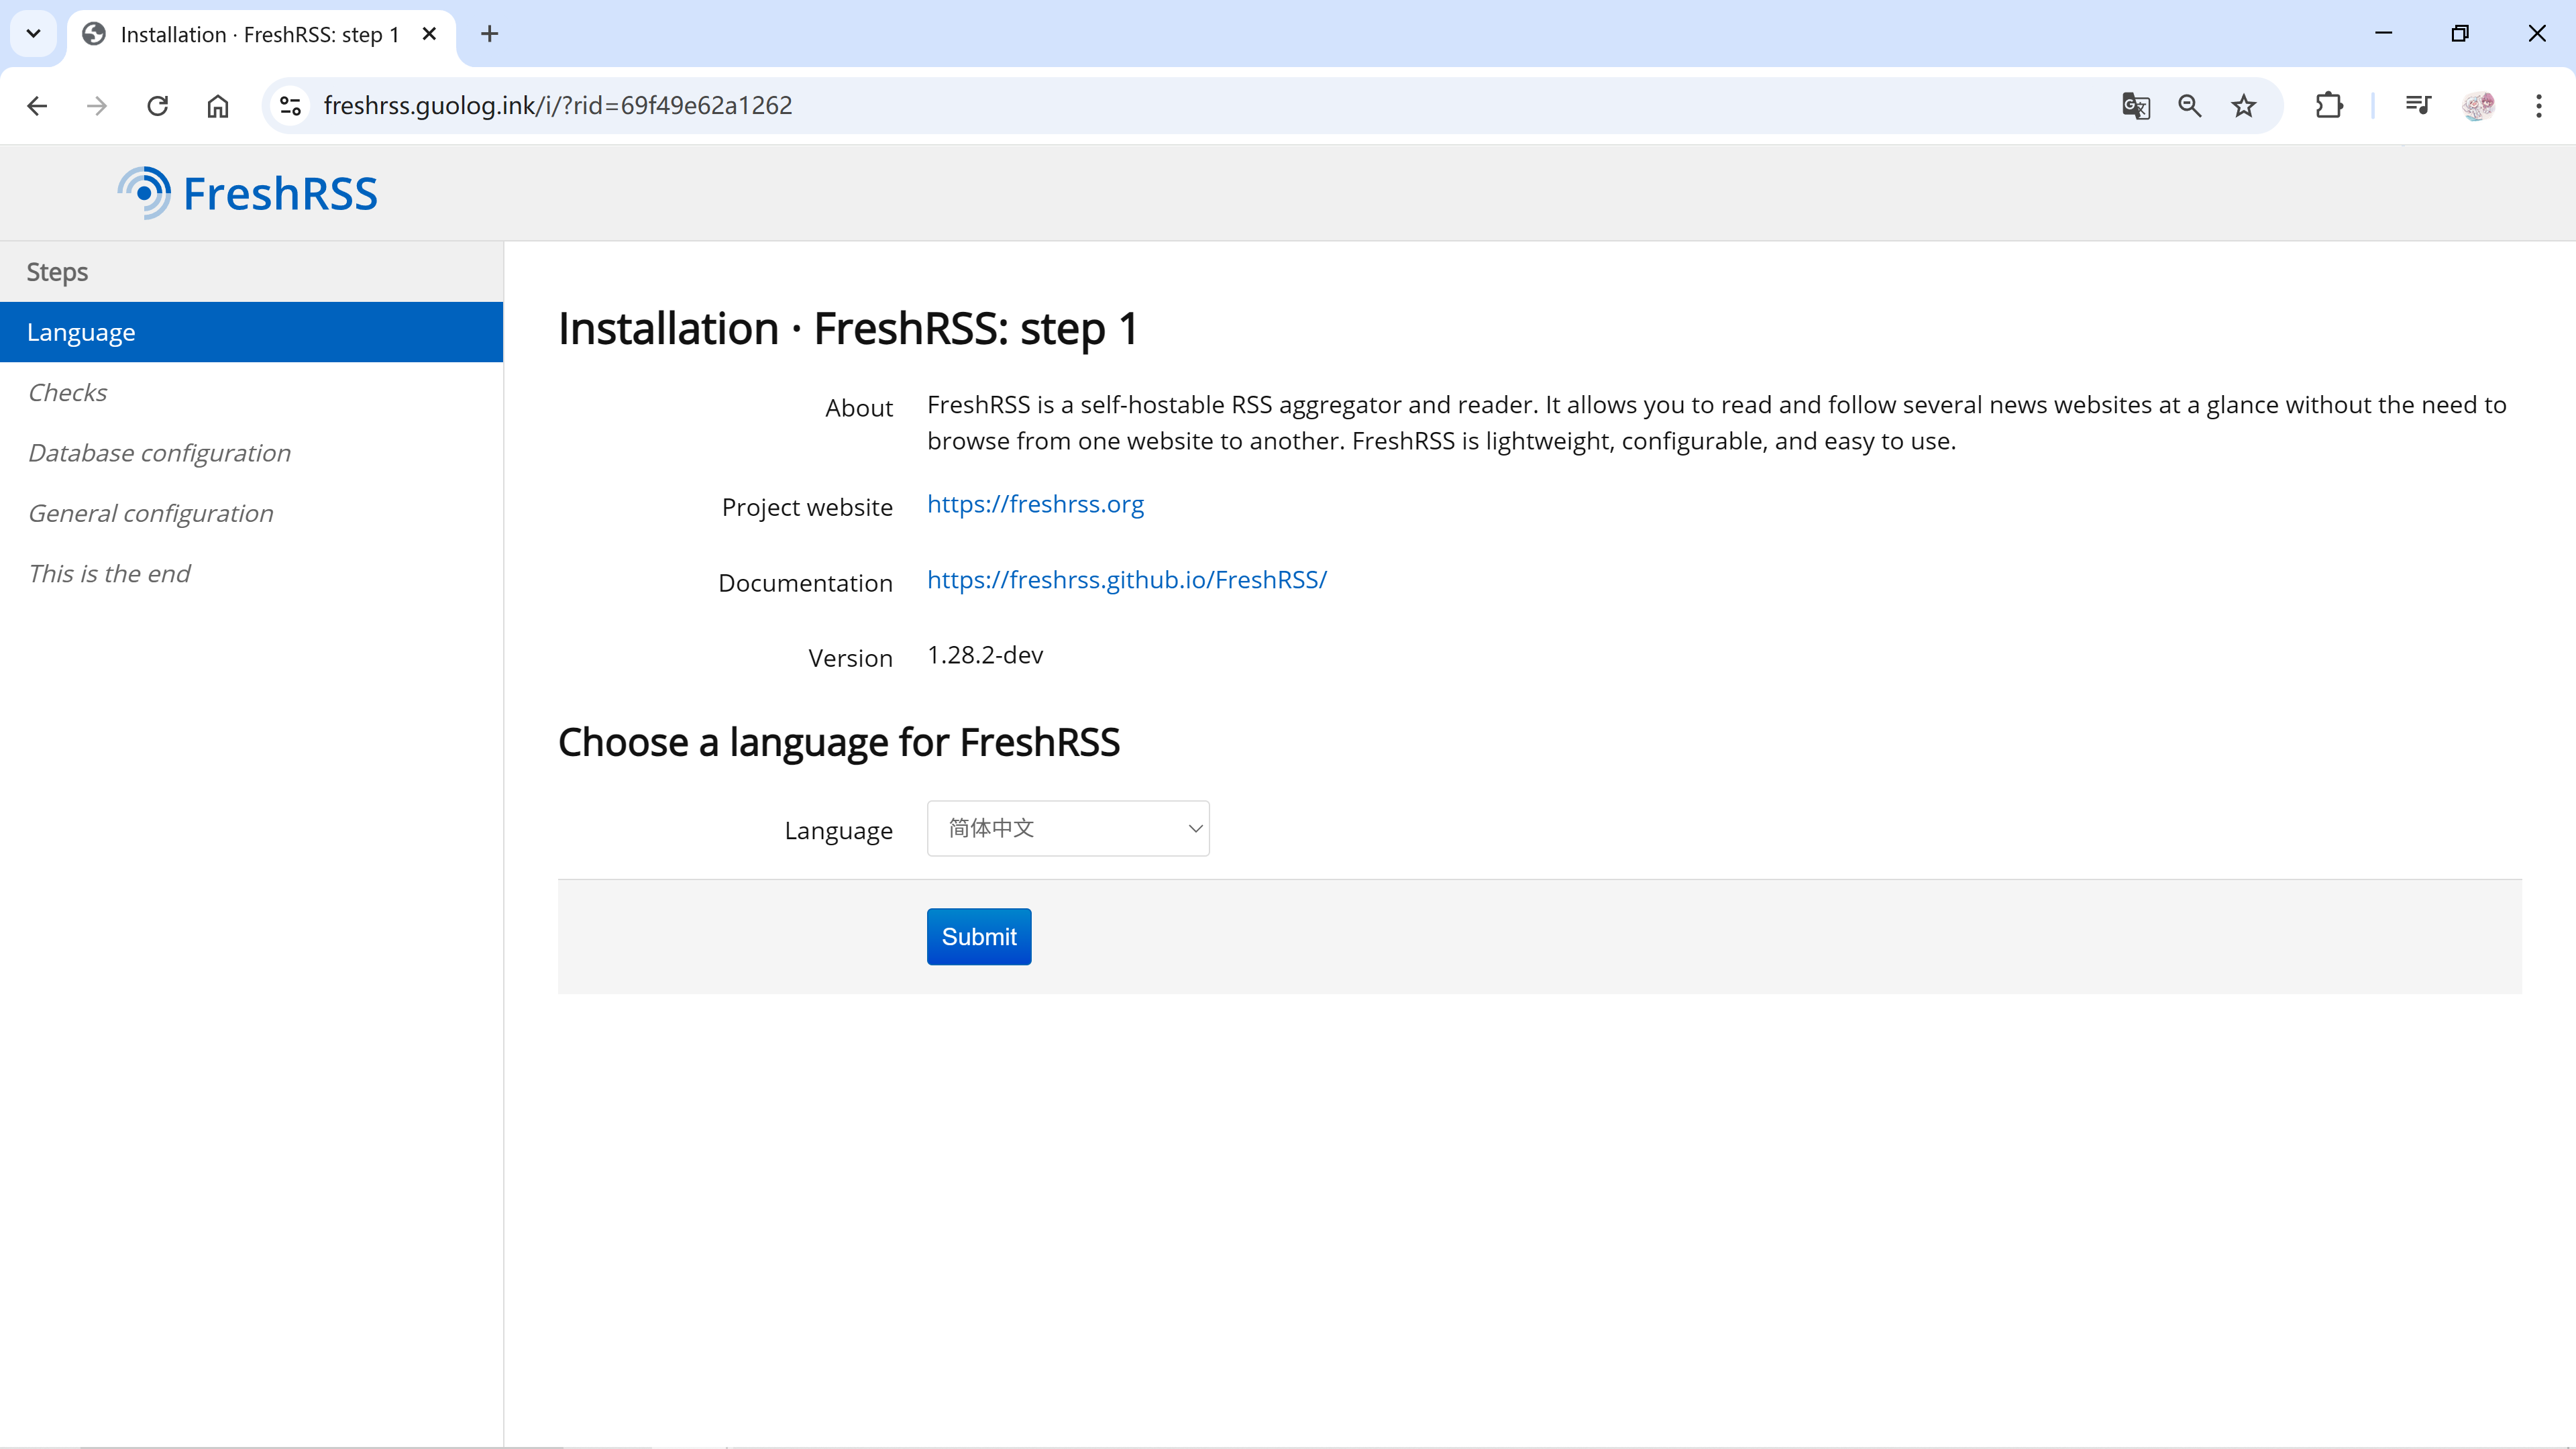
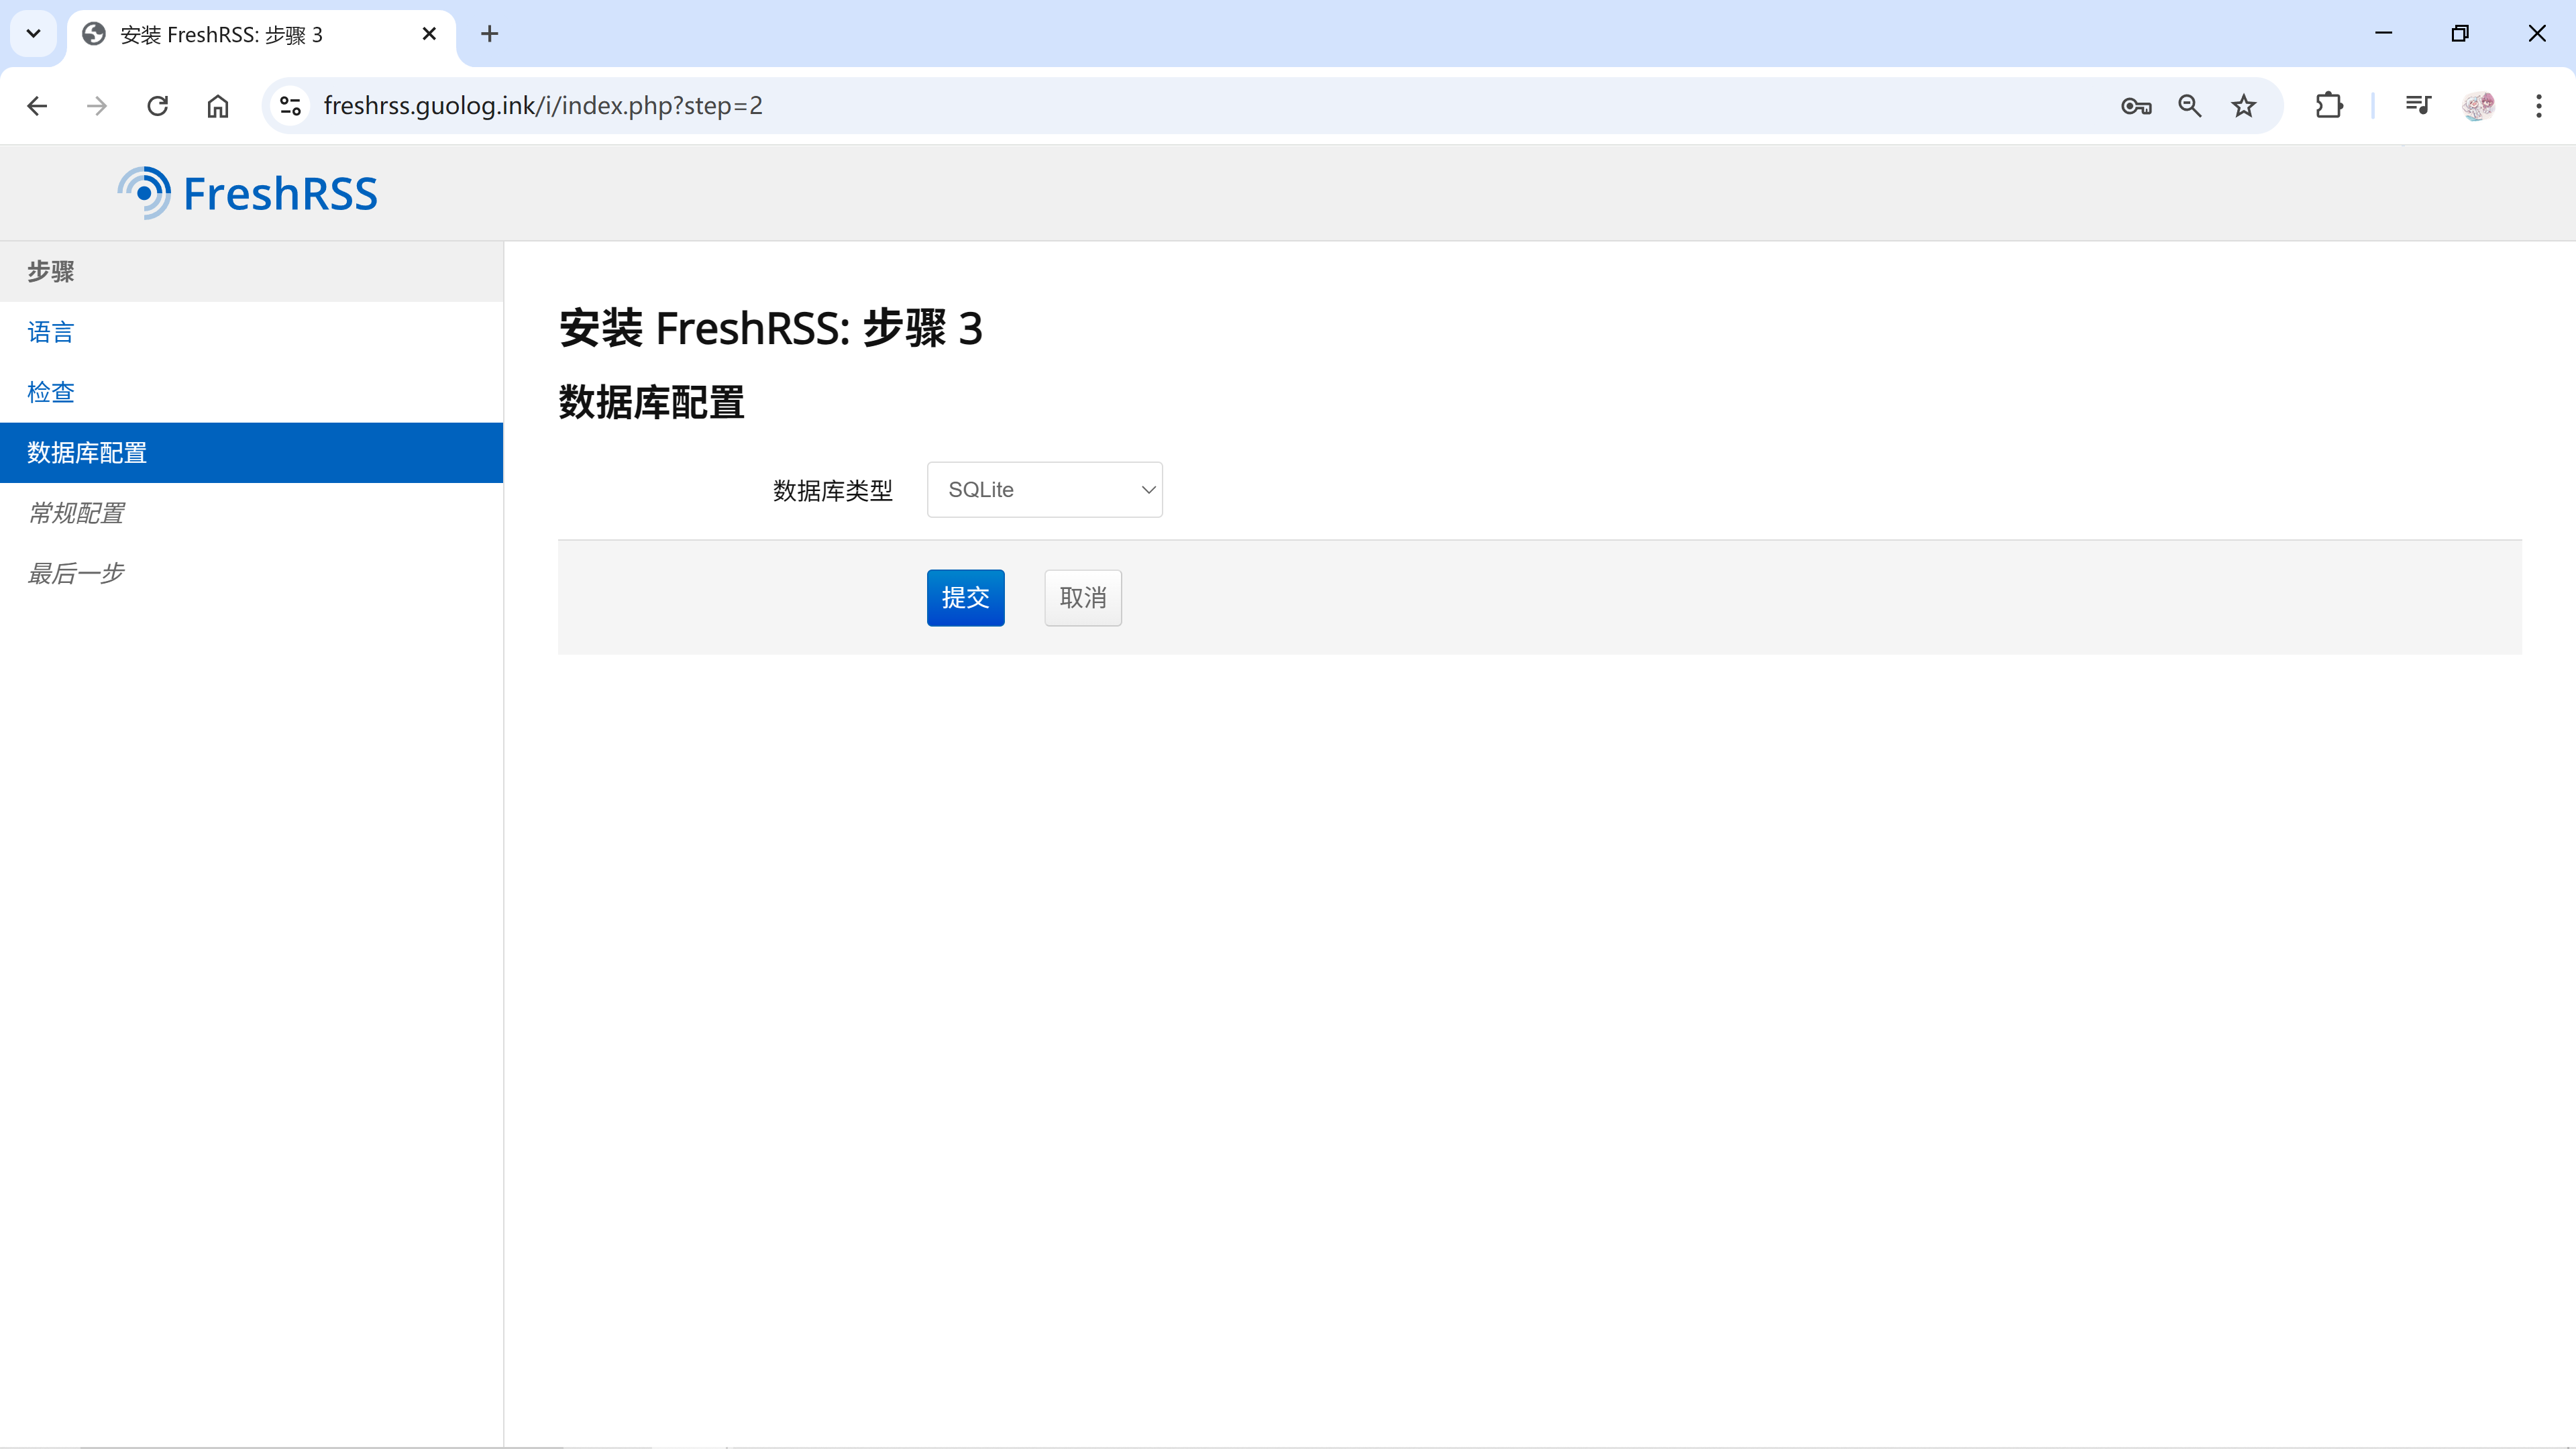
1.3 安装FreshRSS
- 首次进入即安装页面
- 设置配置数据库
- 设置用户名和密码完成安装并登录
成功后默认订阅了FreshRSS的Github发布源,会看到历史的发布信息。
2 使用Docker部署RSSHub并完成基础设置
1.1 DockerCompose部署RSSHub
RSSHub的Docker仓库地址为:https://hub.docker.com/r/diygod/rsshub
官网地址为:https://docs.rsshub.app/
可以在https://docs.rsshub.app/zh/deploy/页面找到详尽的部署说明。下面也是摘取了官方文档的核心部分。
- 创建一个用于挂载数据的目录
1 | mkdir -p /opt/rsshub/redis-data && cd /opt/rsshub |
- 编写 docker-compose 配置文件并启动
1 | services: |
1.2 Nginx配置反向代理
1 | #RSSHub |
1.3 完成部署
3 安卓移动端安装Read You并配置FreshRSS
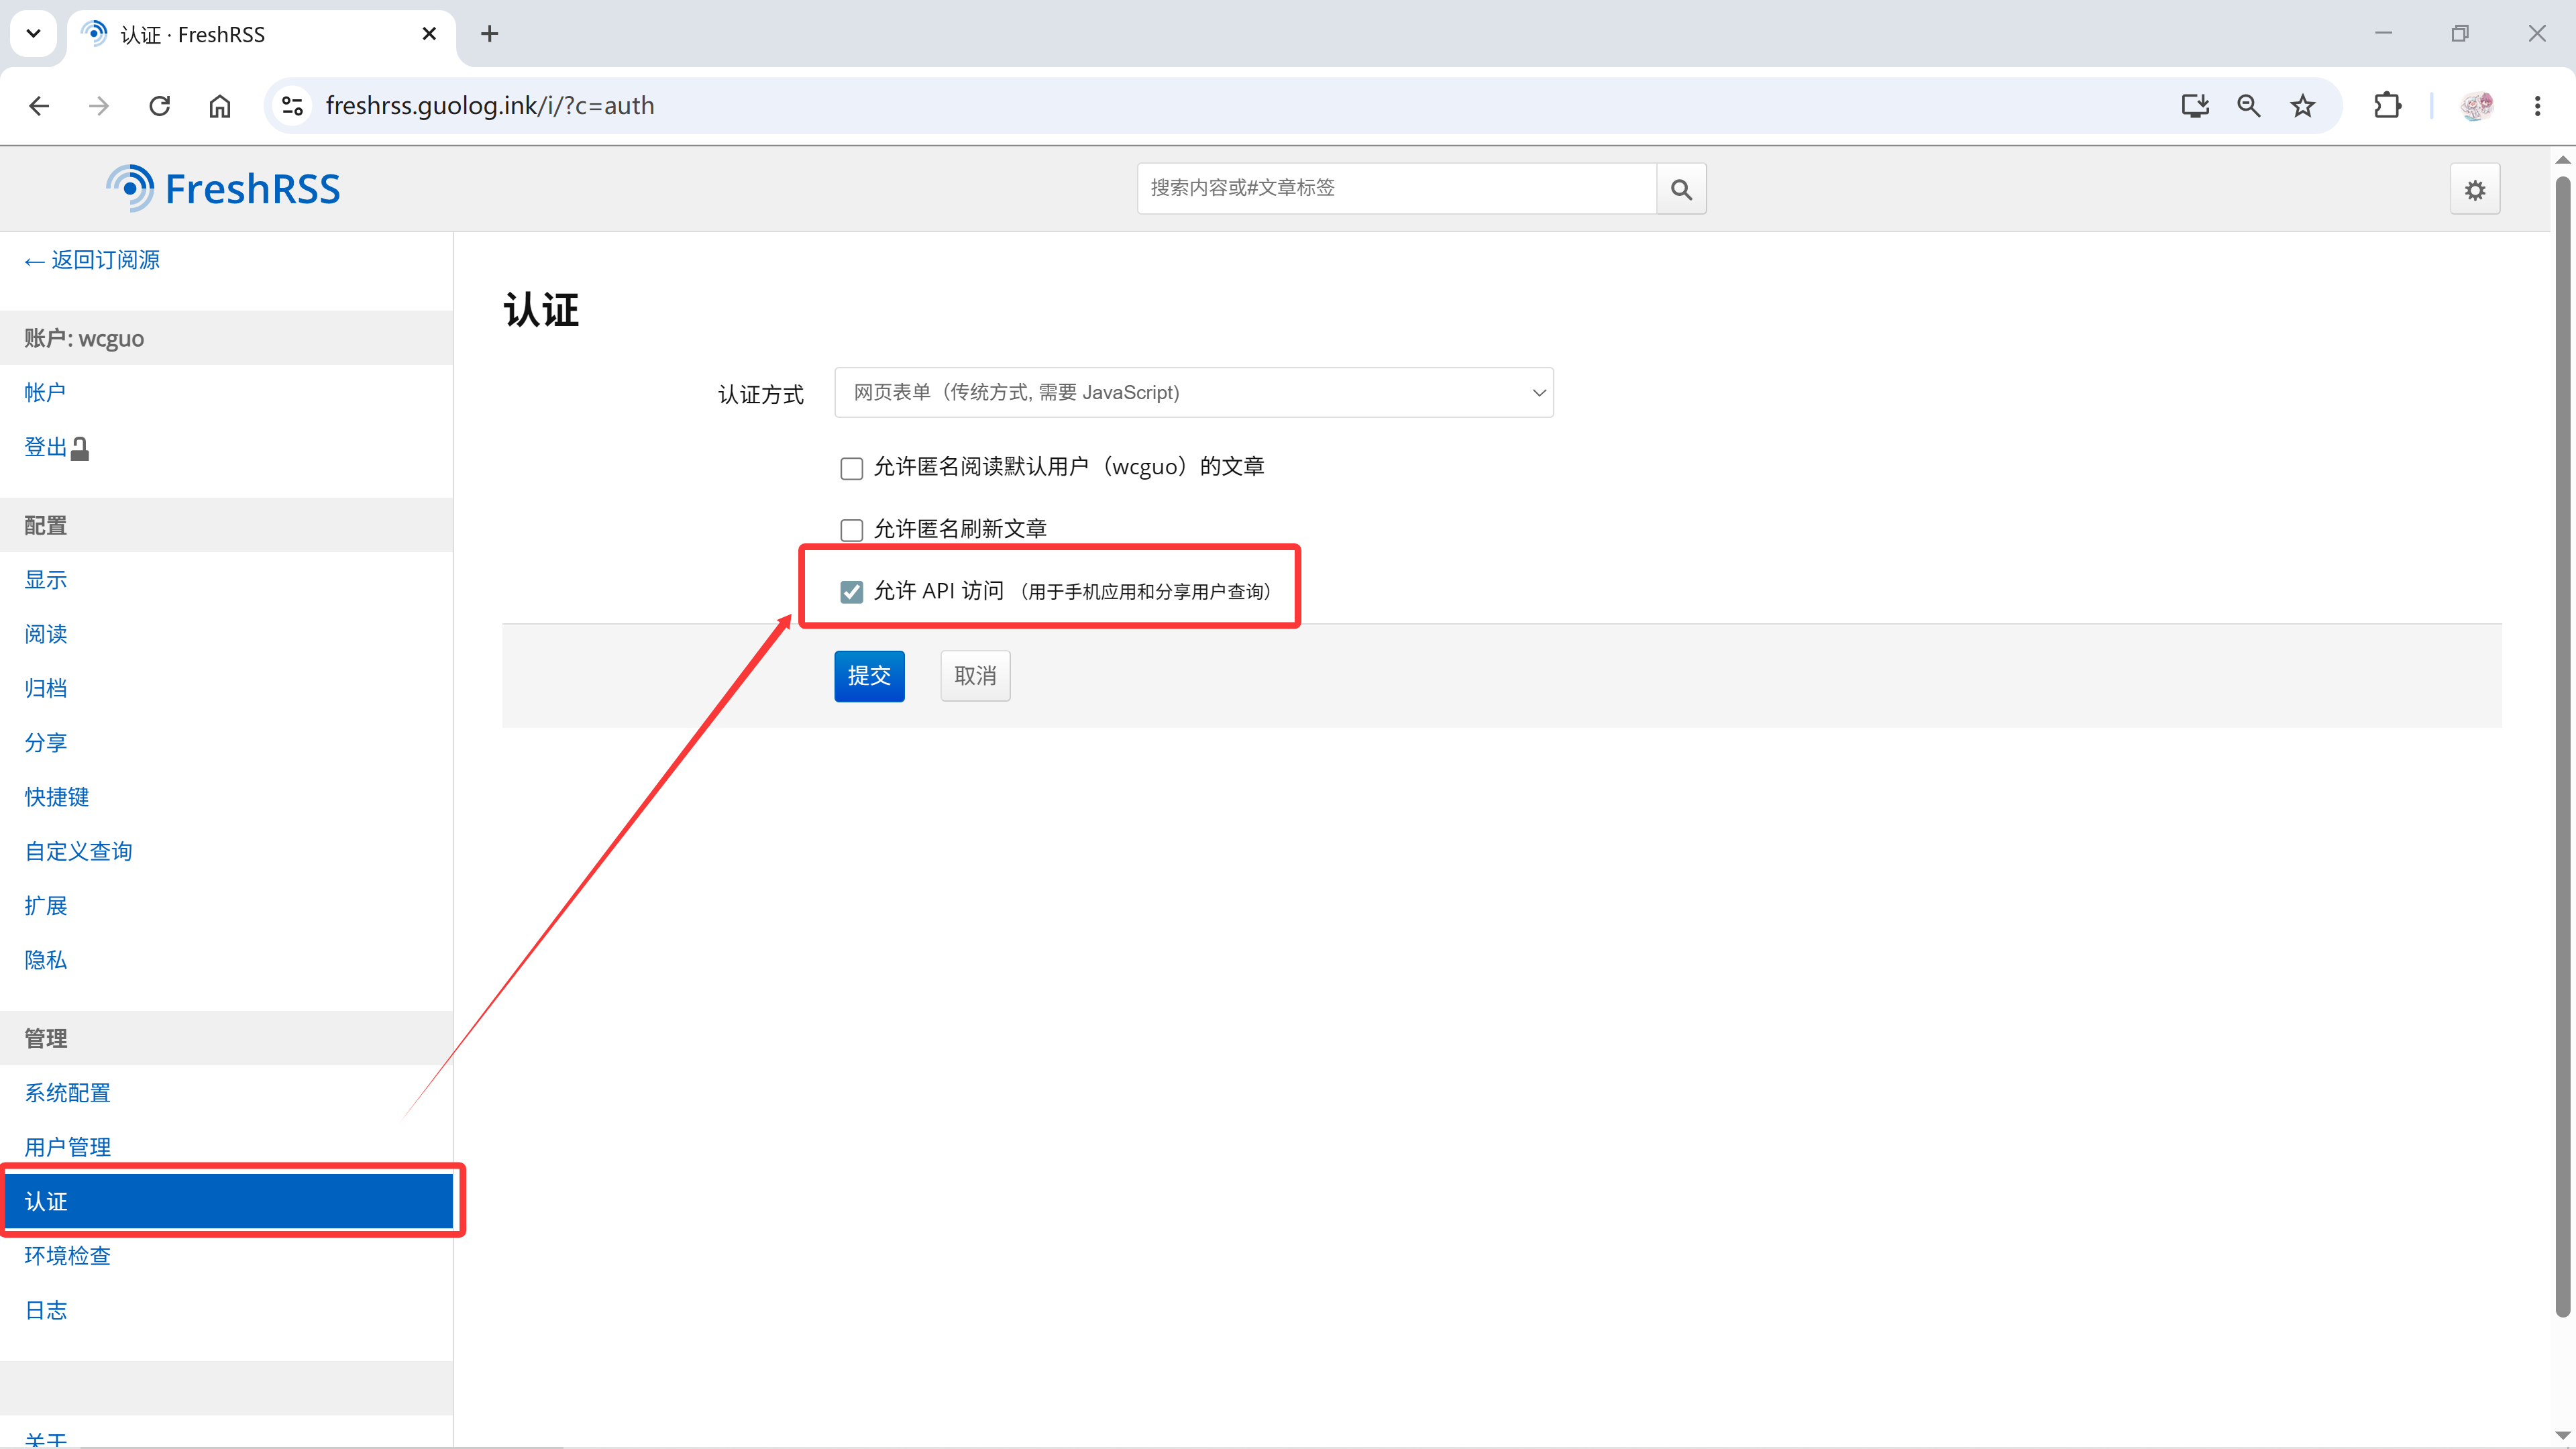
3.1 FreshRSS设置API访问
3.1.1 打开API访问
在【设置 -> 管理 -> 认证】页面中勾选打开。
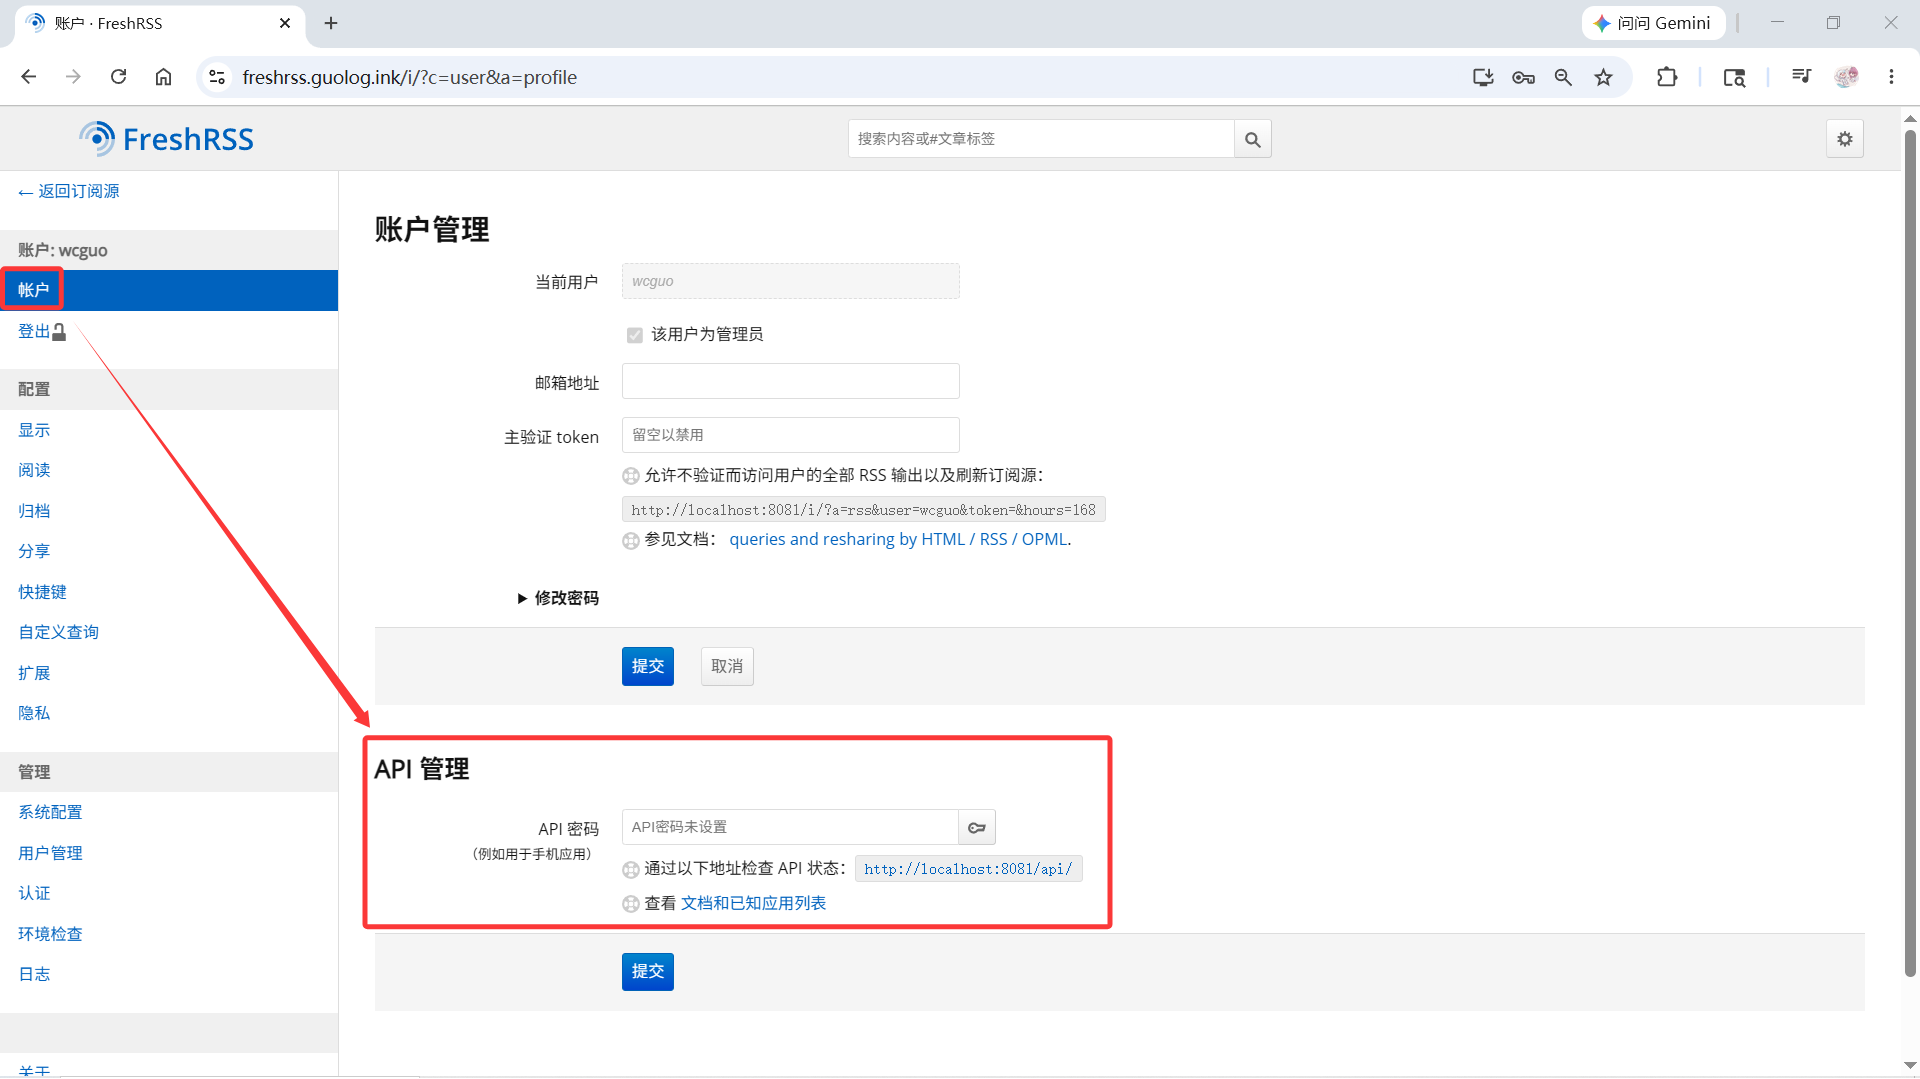
3.1.2 设置API访问密钥
在【设置 -> 账户 -> API管理】中输入API密码并提交。
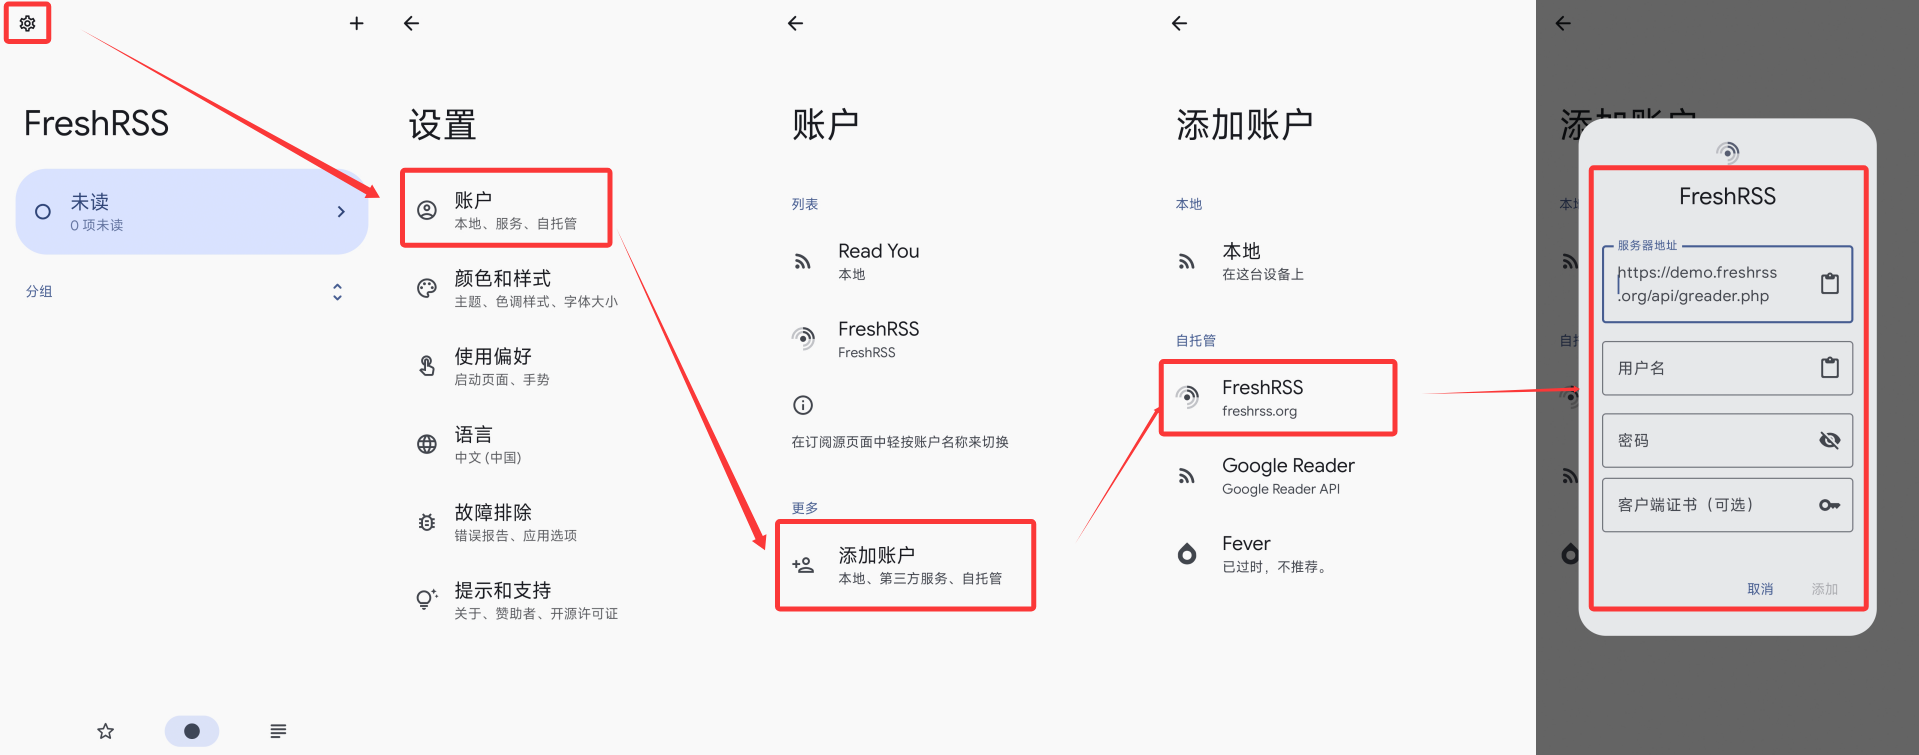
3.2 安装ReadYou并添加账户
Read You 的Github仓库地址:https://github.com/ReadYouApp/ReadYou
安装完成后在【设置 -> 账户 -> 添加账户 -> FreshRSS】输入服务器和刚才设置的账户信息。
成功后即可查看订阅和阅读文章了。